How to grease and flour a pan?
A great treat begins with good preparations.
That’s where we come in! Allow us to help you with this concern, and you will see that greasing and flouring your pan is as easy as eating that cake you’re about to bake.
Why Grease and Flour the Pan?
Before we start, let’s briefly talk about why you would want to grease and flour your pan.
Greasing and flouring your pan is a way to create two layers of non-stick protection. Not only will it increase the chances of a clean release, but it could also help with clean-up. If you want a pretty cake and an easy-to-clean pan after, you’d probably want to grease and flour your pan. (Only if the recipe instructs you to. We’ll discuss this in more detail later.)
Choosing the Right Greasing Material
Greasing is the first part of this two-step process. However, before you start greasing, make sure you have a clean pan! After that, you’re ready to start greasing.
Shortening vs. Butter
Okay, so what should you use to grease your pan?
Well, there are two crowd favorites – shortening and butter. Depending on what you’re making or your preference, one would be better than the other.
You might want to go with the butter if you would like for it to impart its flavor to what you’re making. To add, it could also help you if you’re trying to achieve a golden-brown shade. On the other hand, you might opt for the shortening as it won’t interfere with the flavor. You could say that the shortening will only stick to its job of protecting.
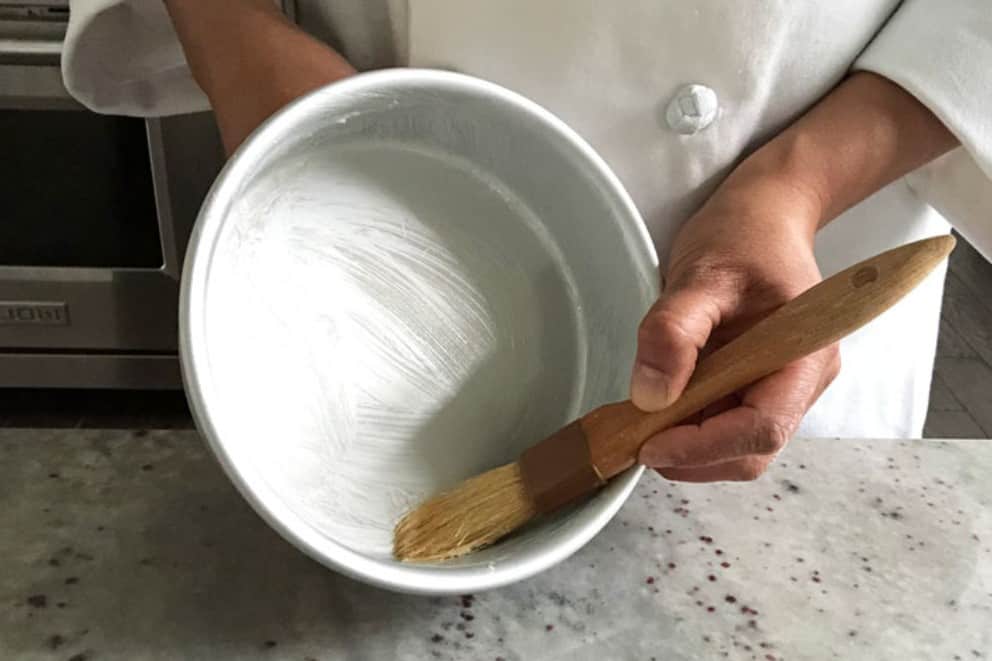
Effective Greasing Techniques and Tools
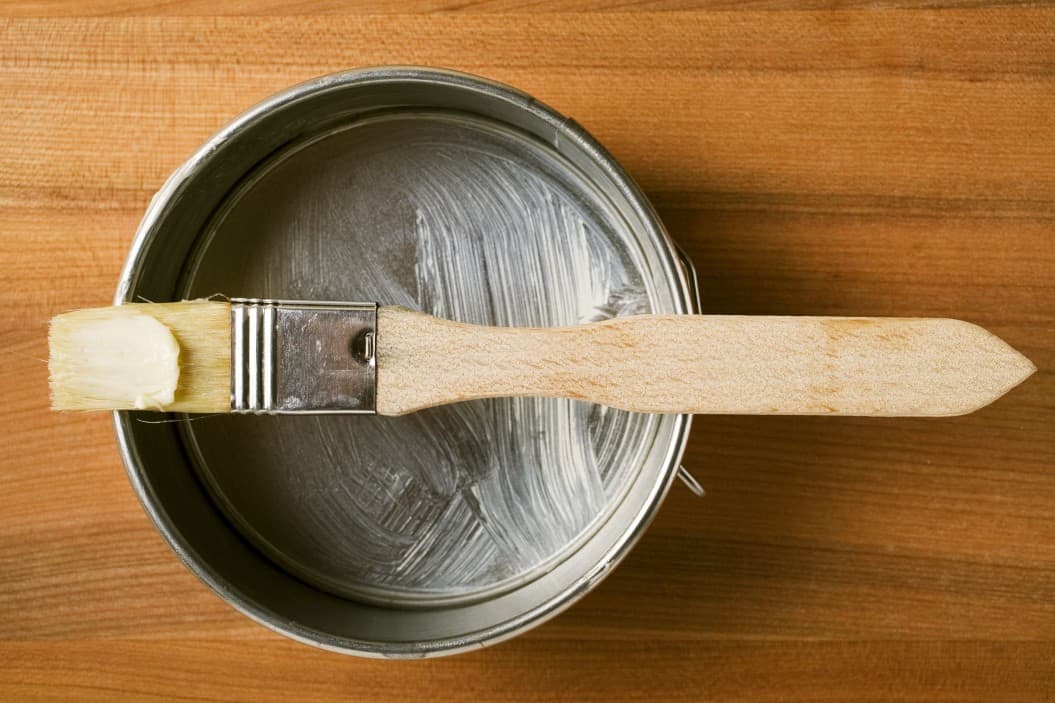
After deciding between the shortening and butter, you’d want to choose what tool you’re going to use for spreading. After all, you’d want to make sure that whatever you choose between the two, you spread evenly.
ou can use your hands, though it’s not the preferred method
If you use butter, you can apply it directly. Just remove it from its wrapping. However, you might want to only peel it halfway, so half of the butter is still covered. This way, it would be easier to hold it.
Third, you can even use some paper towels if you want. However, you might want to keep in mind that it could absorb some of the butter or shortening. It could help with evening the layer, but it might also use more product than the other options. It’s not much, but it could make a difference if you have lots of pans to grease and you’re working with limited resources.
Fourth, you can also use a paintbrush. However, make sure it’s new, you wash it, and you will only use it for this purpose. Keep in mind that you might have a hard time cleaning this one.
Lastly, many consider the pastry brush to be the best tool for this job.
Hands-On Application
Once you’ve chosen between the shortening and butter and picked your tool, it’s time to use them on your pan, but your grease might not yet be ready. You might be having a hard time spreading it or even trying to scoop it out. Putting in more elbow grease is not the best answer. You’d want to let that butter or shortening sit at room temperature for a few minutes. It should be more workable after some time.
As we’ve said earlier, you want to apply your chosen grease as even as possible. Additionally, make sure you cover every nook and corner. Failing to do either of the two might result in a problem. We don’t want that!
The Limitations of Oil
You might be wondering why we didn’t mention oil. That is because oil is not the best choice for this job. Oil and oil-based sprays could be great when you’re cooking, but they’re not the best when you’re baking.
One of the reasons you grease the pan is to lessen the mess. Oil could make the predicament bigger. They harden when heated, and this makes them harder to clean after.
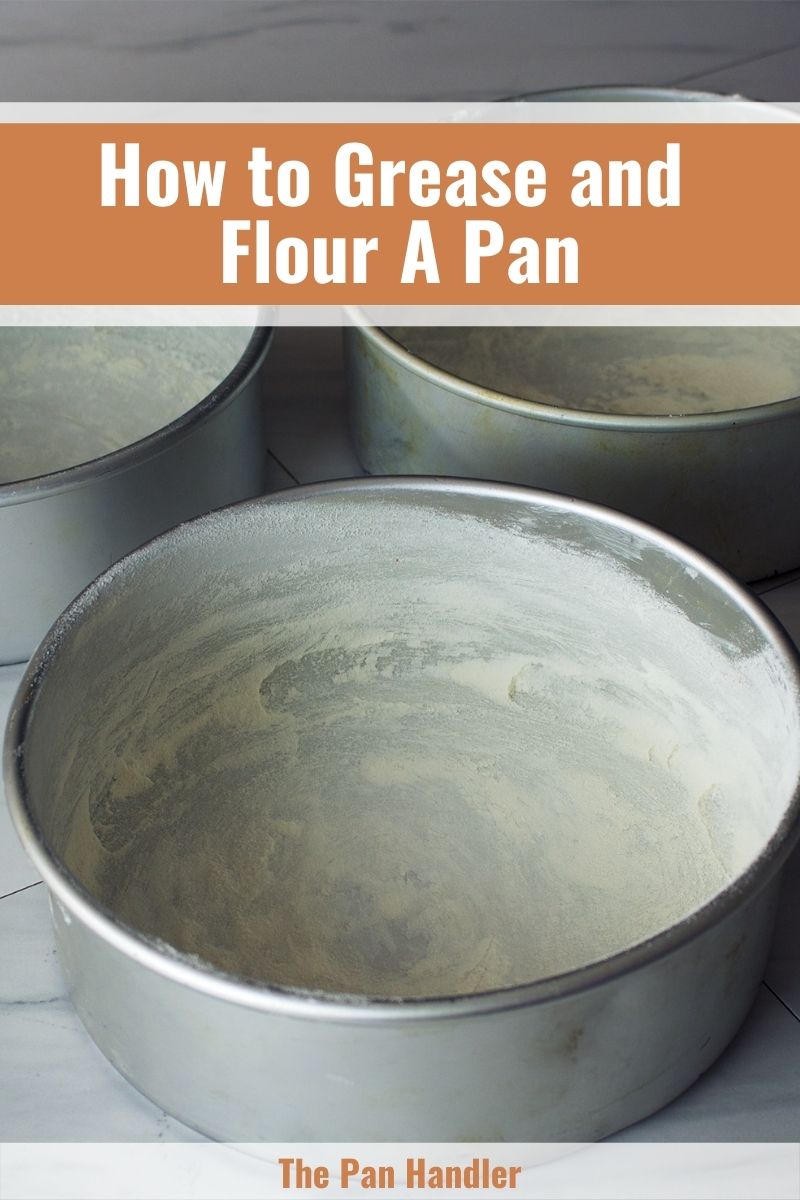
Flouring Your Pan: The Right Material and Method
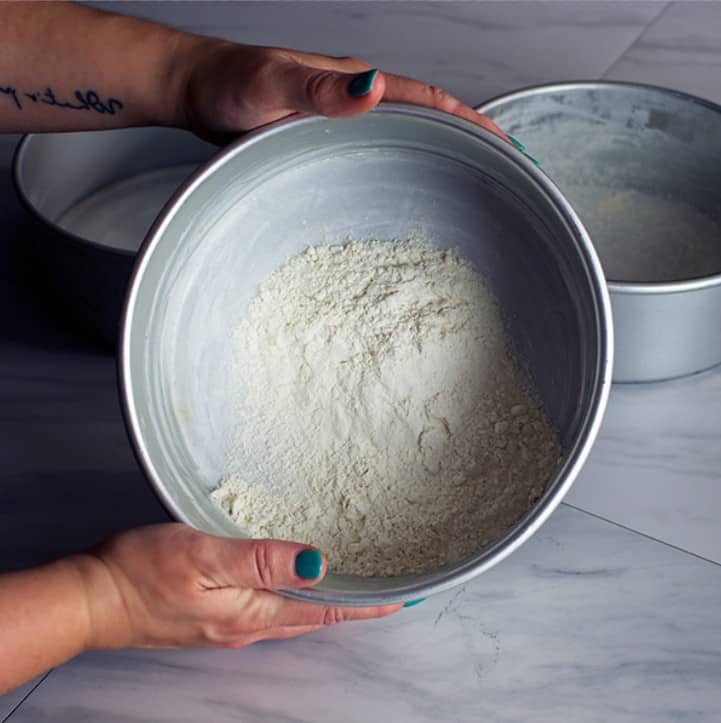
After greasing, the second step is flouring the pan. Before you begin this step, you might want to do one last check to make sure you’ve laid up the grease evenly. Make sure there are no lumps or ungreased spots!
Choose Your Ingredient
There are two popular choices in this step.
As you might have already guessed, the first one is flour. Many favor it as it is flavorless, and it won’t interfere with the flavor of what you’re making. You can usually use any flour, but many suggest using the same one you used in the pastry.
However, there are times flour is not the best choice. It may be flavorless, but it is not colorless. When you use it, your baked goods would probably have a casting of white flour on top. Now, that is not always desirable.
If what you’re making has chocolate in it, you might want to opt for cocoa powder instead. However, unlike flour, it is not flavorless. If you opt for cocoa powder, you might want to make sure its flavor would match with what you’re making.
Achieving an Even Flour Spread
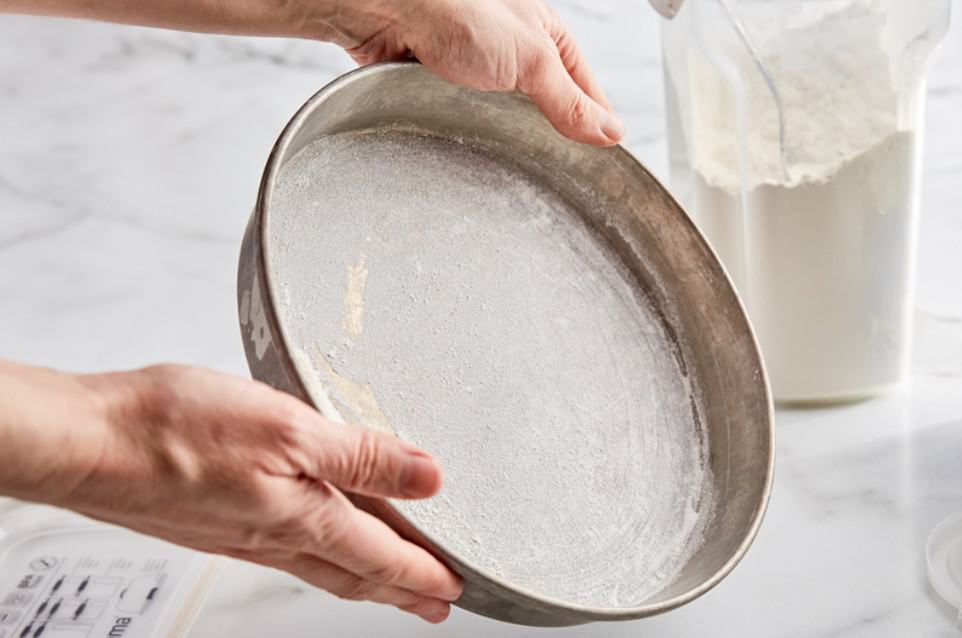
Using your fingers, a spoon, or maybe even a strainer or sieve, you want to put and spread some flour on the pan. You don’t have to put too much. All excess flour might only go to waste if you’re only flouring one pan. One tablespoon should usually be enough.
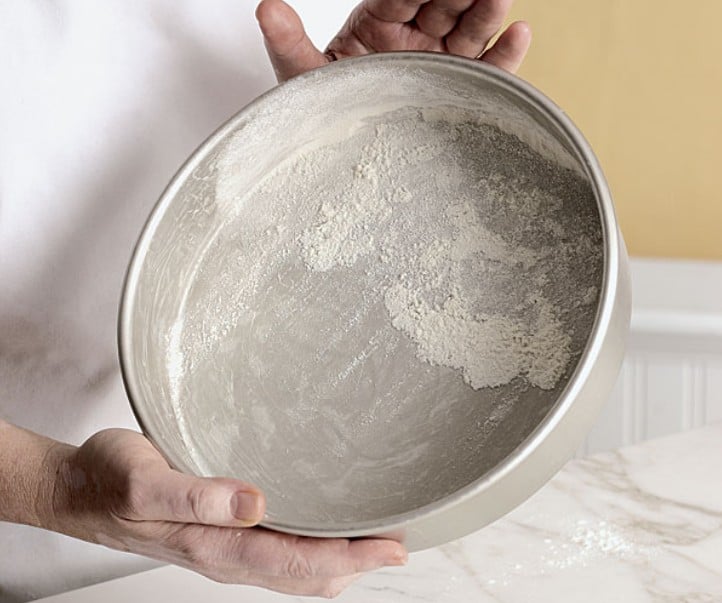
Now, what you want to do is cover the interior with flour. Not just the bottom but the sides as well. There are several ways to do this. A combination of tapping, gently shaking, and tilting the pan should do the trick. Again, take your time. You want all crannies covered with flour.
Once done, you can dump the excess flour on another pan you’re planning to flour. On the other hand, you can throw it in the trash bin or the sink. If you choose the latter, make sure you clean up immediately. Leaving the flour in the sink for some time might make it hard to remove later on.
The Optional Third Layer: Parchment Paper
You would think that two layers of protection are enough. Usually, it is. However, a recipe would, sometimes, call for a third layer – parchment paper.
When I first heard about this third layer, I was 99% sure that it would go at the very bottom of everything. It might not be a surprise for others, but I was a little surprised to know you put it after the grease and flour. So, if you come across a recipe calling for the use of parchment paper as a third layer of protection, you know where to put it. Ensure you place it correctly.
Pour the Batter!
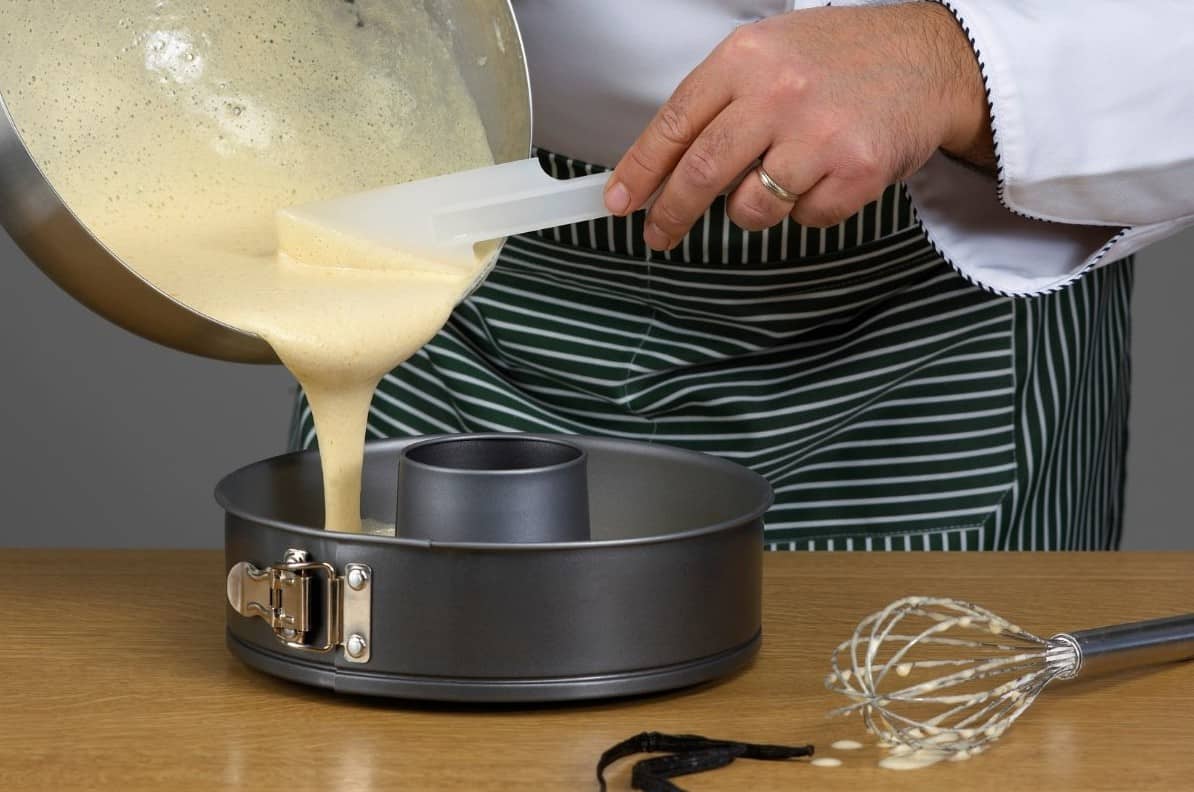
After greasing and flouring, you can now pour in the batter!
Carefully add the batter to the pans. If the batter drips in places with no grease and flour, you’d want to clean that up before you put everything into the oven. If you don’t, it could make clean-up time a little challenging.
You might want to make sure you leave your baked goods to cool down before getting them out of the pan. Usually, a few minutes is enough, but be sure to follow the suggested cooling time of the recipe for best results.
Special Baking Considerations
Some Recipes Don’t Call for Greasing and Flouring
Greasing and flouring are great for the preparation steps. That is if the recipe calls for it. Sometimes, some recipes only call for either or neither of the two. Make sure to check!
Non-Stick Pans: Do They Change the Game?
Greasing and flouring a pan might be easy, but they are still extra steps. You might be wondering if you can do away with them if you use a non-stick pan. Even if you have a non-stick pan, we still recommend greasing and flouring the pan, especially if we’re talking about an old one.
Using Textured Pans Effectively
You can grease and flour many pans, but it is suggested that you use a pan with some texture on it, especially if you opted for one of the two brushes. However, some textures are more prone to cause lumping. You might want to keep all this in mind when choosing a pan to use or even if you’re planning to buy a new one!
Summary
As demonstrated, greasing and flouring a pan is simple and beneficial. It makes clean-up easier, and of course, we can’t forget it helps make your baked goods look gorgeous.
If you have any other baking concerns like this one, you might want to check out our previous discussions. We might have a pan-tastic solution to your problem!


Michael Johnson is the founder of Pan Mastery, Inspired by his blacksmith grandfather’s legacy has a deep appreciation for hand-crafted pots and pans, he provides invaluable guides, reviews, and recipes to enhance your culinary journey.