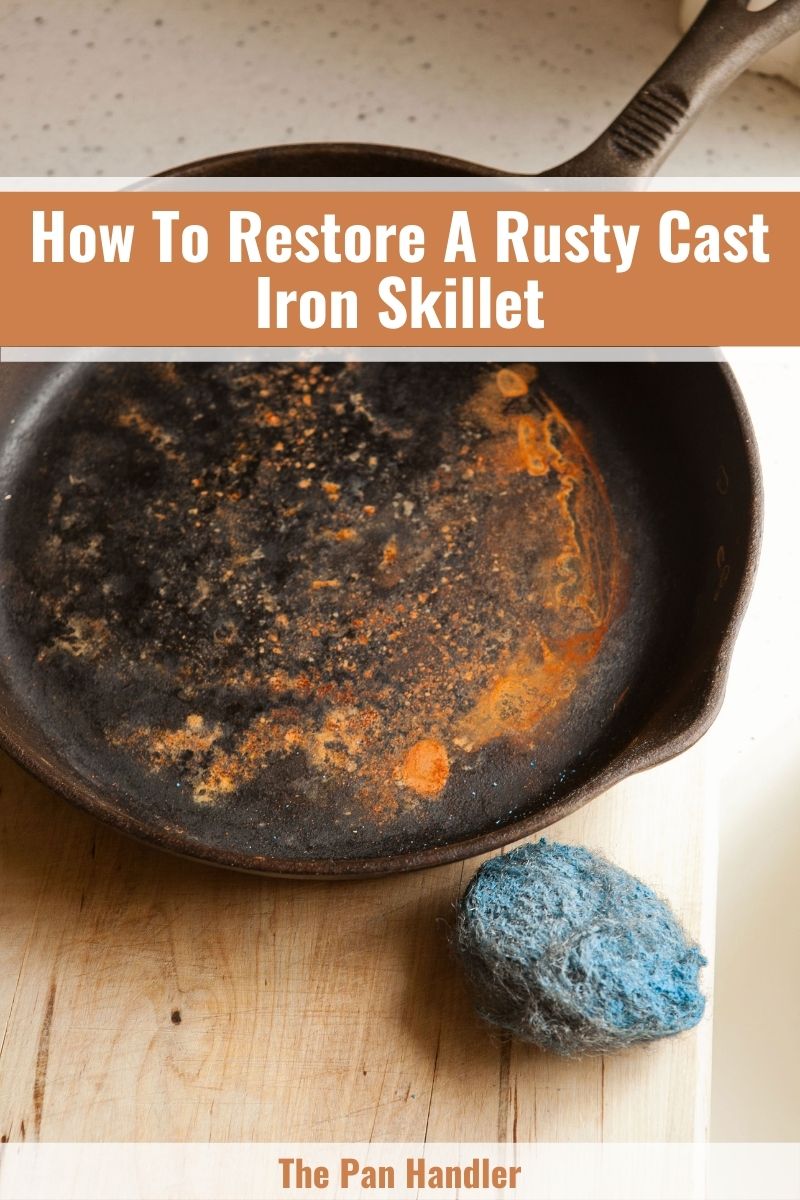
Do not throw out your rusty cast iron skillet just yet. You can still salvage it as long as you know how to get rust out of a cast-iron skillet. Skilled Chefs and mothers prefer and trust using cookware made of cast iron. Though they can be heavy, they are known to be resilient.
What is a cast-iron skillet?
If you are a chef by profession or someone who loves to cook for your loved ones, then you know that having a cast-iron skillet is a worthy investment. Skillets made out of cast iron are often used for various cooking techniques such as broiling, roasting, braising, baking, and a lot more. And it is a type of skillet that is recognizable to many due to its popularity.
If you are not into cooking and wonder what a cast-iron skillet looks like, it is a type of cookware with angled sides or corners. Thus, resulting in a reduced cooking area.
Though even if it has a much smaller cooking area compared to regular cookware, the sole purpose of its angled and slanted sides make it possible to have easy access to reaching and stirring the food you are cooking.
Just like any other types of cookware, cast-iron skillets too, have their own pros and cons, which you may want to consider:
Take a quick look at the table below to learn about the pros and cons of having a cast-iron skillet:
| Pros | Cons |
| Has non-stick surface | Immensely heavy weight |
| Comes with natural coating | Prone to rust |
| Cooking food with a cast-iron skillet is healthier compared to regular pans | Compared to regular pans, the handle may get too hot |
| Heat retention properties | |
| Safe to use with oven | |
| Longer life cycle |
Things you need to get rust from a cast-iron skillet
You will need cleaning materials to get rust from a cast-iron skillet. Do not worry, as these cleaning materials are often readily available in your household. You will no longer need to rush to the grocery store near you; that is if you did not run out of stock.
Below are the cleaning materials you will need to get the stubborn rust off your cast iron skillet:
- Dishwashing Liquid – Dish soap or a dishwashing liquid is often used to remove food residue to thoroughly clean the dishes, such as kitchen utensils, tableware, and cookware.
- Steel Wool – Steel wool has a rough textured finish used to either clean or polish objects made out of wood or metal. The abrasive finish will help you get rid of the rust on your cast-iron skillet.
- Distilled White Vinegar – Vinegar has acidic properties that can help you get the rust off the cast-iron skillet. It is a famous household cleaning remedy.
- Cooking Oil – You will need cooking oil after getting the rust off your cast-iron skillet. Cooking oil is used to season or grease the pan.
- Paper Towel or Dishcloth – A paper towel or dishcloth is used to saturate the pan with cooking oil to season the cast-iron skillet.
Learn how to properly season your cast-iron skillet
9 Ways to get rust from a cast-iron skillet
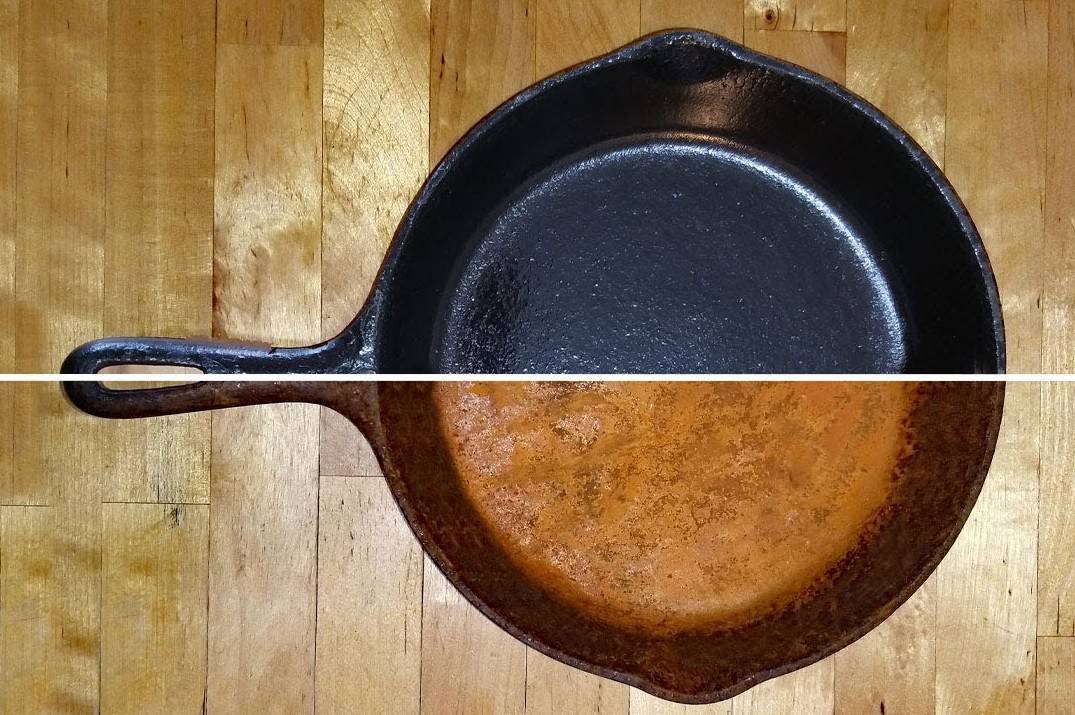
Rust formation to any metal is inevitable. Time will come that it will get rustic, and your cast-iron skillet is not exempted from that occurrence.
However, you do not need to worry about throwing it away because you can still salvage your precious cast iron skillet.
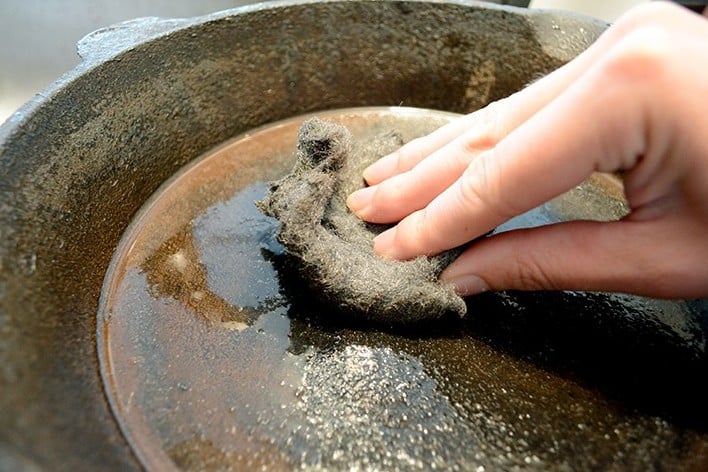
Remove rust from a cast-iron skillet using Lodge Rust Eraser or a Magic Eraser
You can purchase a Lodge Rust Eraser online, and it is a rubber material that can help you get rid of the stubborn rust off your cast iron skillet.
The Lodge Rust Eraser is easy to use as you only need to soak the eraser deep into the water. Once it has been absorbed, you can now start scrubbing your rustic cast-iron skillet.
A good alternative for a Lodge Rust Eraser is the Magic Eraser, which functions similarly.
Remove rust from a cast-iron skillet with Vinegar
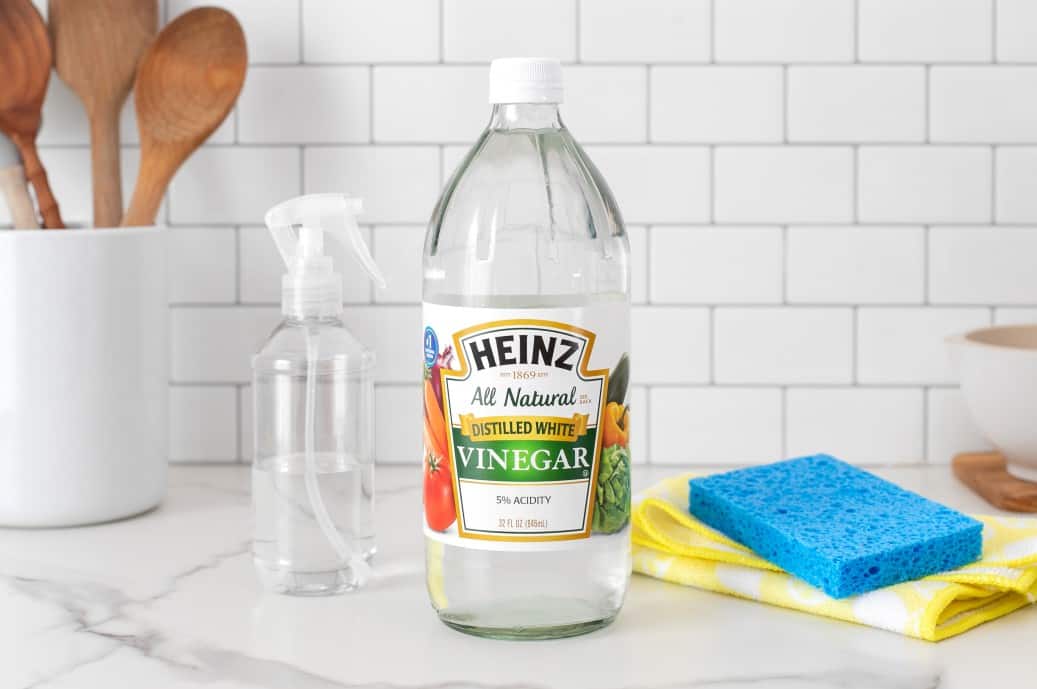
Vinegar as a household remedy is nothing new to our ears. You can also use Vinegar to treat the rust off your cast iron skillet and help it bring back its old glory.
Create a solution by mixing water and white Vinegar and letting the rusty cast-iron skillet soak into the solution. The acid properties of the Vinegar will make the rust start from flaking. But, make sure not to soak the skillet with the Vinegar and water solution for quite a long time to avoid corroding from the surface.
Remove rust from a cast-iron skillet using Steel Wool
It is usually not recommended to use steel wool on any kind of skillet, especially when it is brand new. The rough and spiky texture of the steel wool might ruin the surface.
However, for cases wherein your cast-iron skillet is full of rust, you will definitely need the abrasive finish of the steel wool.
All you need to do is get the steel wool, add a liquid dishwashing soap and scrub away the rust. Once done, do not forget to season your pan with cooking oil.
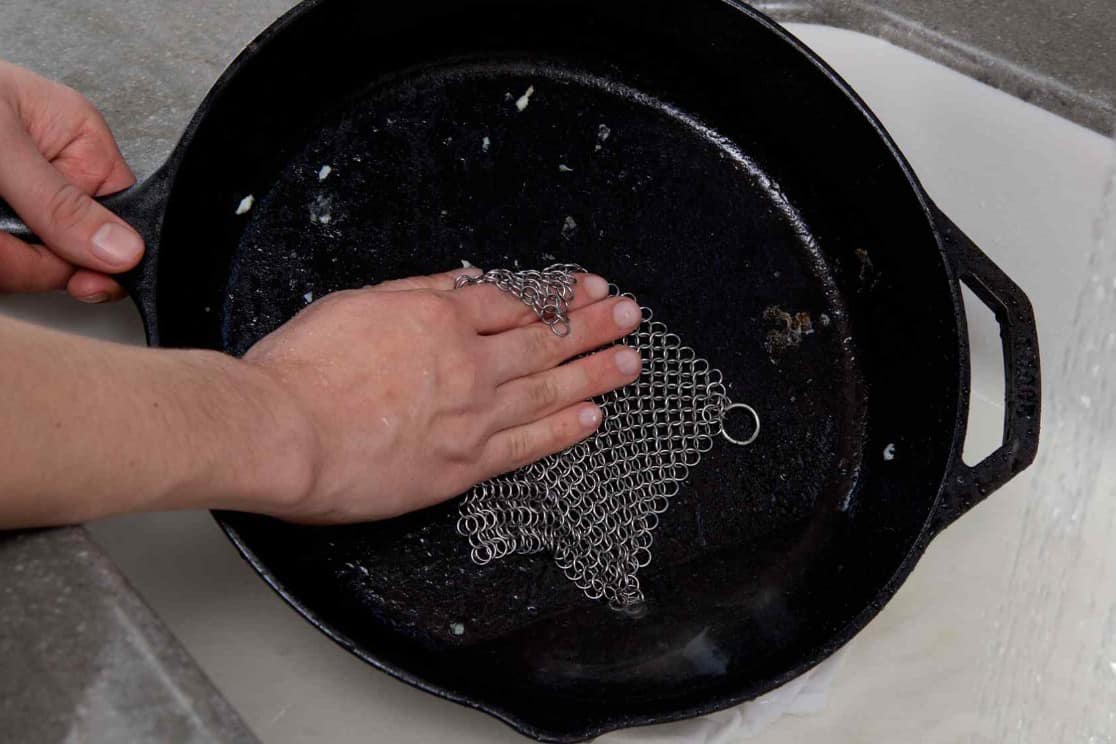
Remove rust from a cast-iron skillet using Chainmail
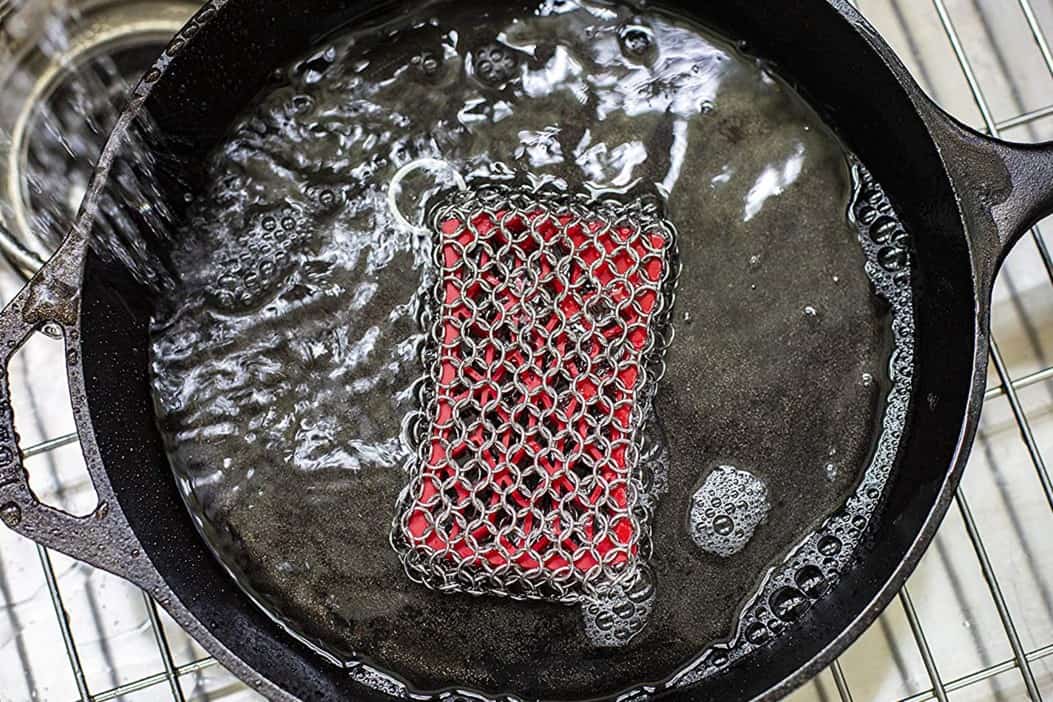
You may be familiar with Chainmail as a body armor common to be worn by knights during the medieval period.
This may sound new to you, but it is also a preferred instrument to get off the rust from iron.
A chainmail scrubber is worth every penny. It is a good alternative for steel wool as it is unbreakable and can last long.
Remove rust from a cast-iron skillet with Potato and Salt
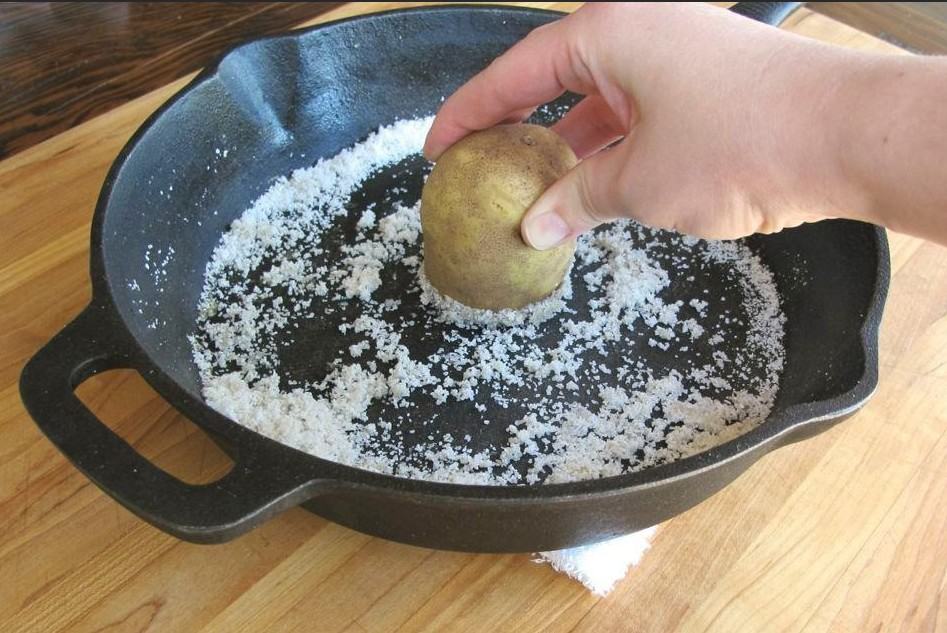
A more natural method to get rid of the rust from your cast-iron skillet is the potato and a coarse salt method.
This method is possible by scattering the coarse salt all around the rusty skillet and using a potato as your scrubbing instrument that you can wipe with all around the pan.
Remove rust from a cast-iron skillet using an Oven Cleaner
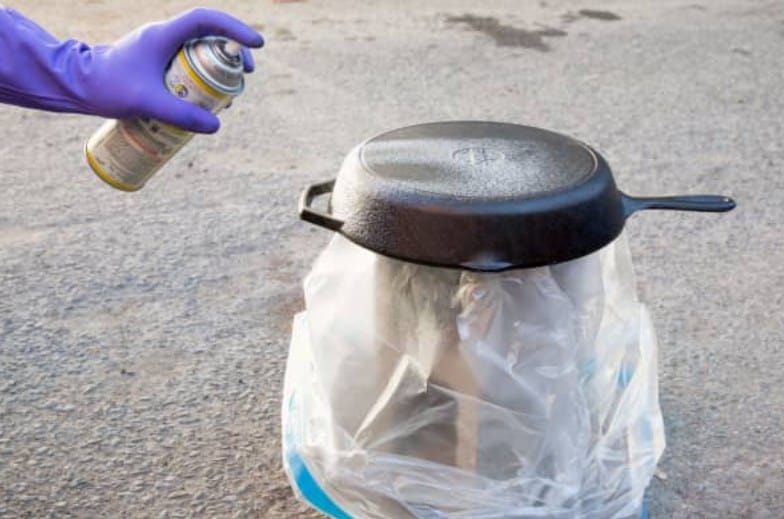
If you prefer a more accessible way and a chemical-based material to get rid of the annoying rust off your cast iron skillet, then you may opt to use an oven cleaner product.
Lye-based oven cleaner can be dangerous if you do not correctly handle it. Ensure that you wear gloves every time you use them and avoid inhaling them to prevent serious health concerns.
All you need to do is let it sit for a little while and do its job. Ensure to wash the skillet thoroughly with soap since it is a toxic solution.
However, since it is a strong chemical, it can also possibly remove the seasoning aside from the rust itself. Therefore, do not forget to wipe cooking oil onto your cast iron skillet to have it seasoned.
Remove rust from a cast-iron skillet using a Sandblaster
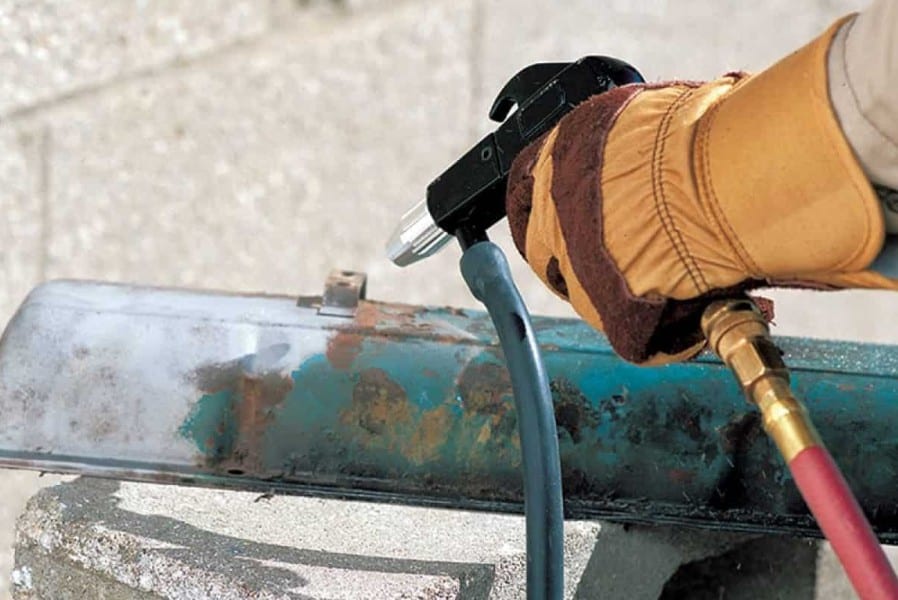
If you forgot to have your cast iron skillet prepared for a family gathering and you just found out that it is full of rust, then using a sandblaster to get rid of the stubborn rust is a quick remedy.
Turn on your sandblaster equipment and remove the rust on your cast iron skillet by doing the sandblasting process.
If you do not have one, you can use sandpaper instead. However, it is a more tedious process requiring more effort to remove the rust thoroughly.
Remove rust from a cast-iron skillet with Electrolysis
Another way to get rid of the rust off your cast iron skillet is by doing the electrolysis process. Though this process may feel like a science experiment all over again.
Though this can be more expensive and require more time to prepare, it does its job very well. All you need to do is prepare a bucket filled with water, a c-clamp, a dowel, a battery charger, and a washing soda.
Ensure that you are in an open area when you do the electrolysis process since it can cause a fire.
Remove rust from a cast-iron skillet by burning it off
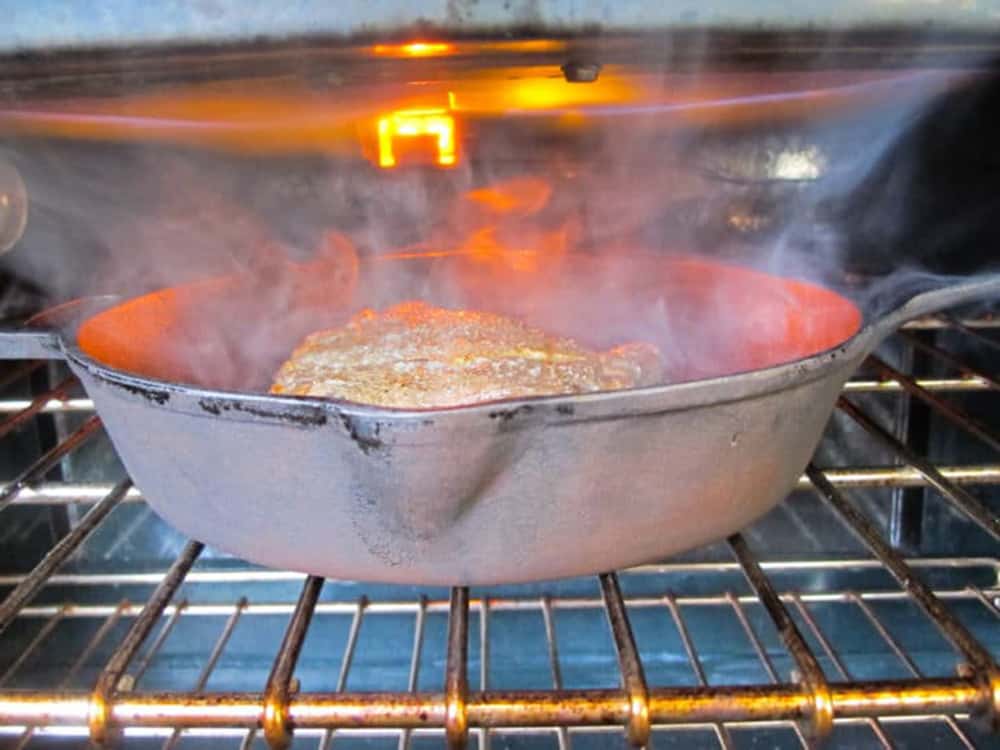
If you do not have any of the tools needed to help you get rust out of a cast-iron skillet, you can opt just to burn the rust away and follow it up with a quick scrub to fully get rid of its rust.
The Steps to Remove Rust from a Cast-Iron Skillet
Regardless of which method you use, they all have common steps to get rid of the rust off your cast iron skillet.
- Use a solution or create your solution and let the rusty cast iron skillet soak for a little while. Though the soaking process may take a little longer depending on the thickness of the rust and the solution you opted to use.
- You can now start the next step when you notice that the rust starts from flaking off the pan.
- Start scrubbing off the entire pan using steel wool, chainmail, or a brush.
- Once there is no trace of rust on your skillet, thoroughly wash the skillet with liquid dishwashing soap, mainly if you have used a toxic chemical solution.
- Use a dishcloth or a paper towel to dry the skillet or heat it quickly. Avoid air-drying the skillet.
- Once fully dry, you may start seasoning the pan with cooking or vegetable oil, rubbing it onto the entire pan to help bring the skillet back to its former glory.
Watch the short clip below to learn about 5 ways how to keep your cast-iron skillet from rusting
Summary
Throwing away your rusty cast-iron cookware should never be an option, especially if you can still salvage them. Now that you know the ways on how to get rust out of a cast-iron skillet, go and find all the old cast-iron cookware you have been hiding in your storage room waiting to be cleaned up.


Michael Johnson is the founder of Pan Mastery, Inspired by his blacksmith grandfather’s legacy has a deep appreciation for hand-crafted pots and pans, he provides invaluable guides, reviews, and recipes to enhance your culinary journey.